
Essex
Smacks
Boat
Pilgrim

About Pilgrim
Built by Brian Kennell in 2012 for Steve Ellis.
Currently sailing in the sheltered waters of the Carrick Roads in Cornwall. Although she retains the look of a traditional East Coast craft various modifications have been made, see below for details.
The two main 'articles' (Gybing Centreboard and Good Tack/Bad Tack) describing what has been done, and why, have been assembled from my emails to my local sailing buddies here in Cornwall, followed by my subsequent modifications and experience.
Pilgrim was named in celebration of the Pilgrim Fathers of 'Plimoth Plantation', 1620. They were a hardy bunch; half of them died during the first winter but look what they went on to achieve.
Contents

Pilgrim's Self-gybing Centreboard
The "Good Tack/Bad Tack" Discussion: making Pilgrim's lugsail dip.
Update, 2Q25
An early photo of Pilgrim rigged as a standing lug and with high level side benches (now lowered and much safer).
The Early Rig Decisions
Pilgrim wasn’t my first lugsail dinghy so when it came to the initial rigging I repeated my previous experience:
A standing lugsail with a boom, the sail luff tensioned hard with a multi-part downhaul. A square lashing at the boom-to-mast junction. A ‘choker’ at the yard-to-mast junction, and later a kicking strap. Lazy-jacks to contain the sail when it is struck down, combined with a running topping-lift to support the boom when necessary. I’m quite keen on running control lines back to the helmsman rather than bobbing up forrard to make adjustments. And I think the mast should be tall enough that there is room beneath the hoisted sail to see what lies ahead !
Standing Lugsail
See comments later in this section (because I changed to a balanced lugsail).
The Square Lashing
There are times when one or more of the controls on the sail corners are slack and an unexpected gust can take control of the sail with embarrassing consequences. The vulnerable times are when hoisting and lowering sail. When reefing, even if the boom and sail bundle are lowered right down into the boat, a gust can put the sail into the water if there is nothing to restrain the yard and boom except the slack mainsheet. Once the sail is full of water it’s not easy to recover it. (And this happens when you decided to reef because the wind and sea-state are both rising ….).
The square lashing is quick and easy, using about 3 feet of line. Hoist sail and stand alongside the mast on the side opposite the boom and sail, with your hands level with the boom. Feed the two ends of the line past the mast (one ahead, one behind) and over the boom and let them fall. Reach under the boom, collect both tails and bring them towards you under the boom and once past the mast then tie a reef knot. The lashing should be loose enough that it controls the boom but does not bind on either the mast or the boom.
The Yard Choker
This is an alternative to the familiar rope loop and parrel beads used to keep the yard close to the mast, or a circular metal 'traveller' around the mast with a hook to connect with the boom and a loop for the halyard. One of those methods, or a choker, is necessary to keep the yard in contact with the mast. The advantage of a choker is that when striking down the sail it need not bind the yard to the mast as the parrel and the traveller do, both of which leave the forrard part of the yard sticking out awkwardly ahead of the mast. The choker is rather like a lasso because unlike the parrel beads or traveller it can be pulled tight or slackened off. Pilgrim’s arrangement comprises a line secured to the yard close to the halyard hoisting point, with a small block/pulley also tied to the yard. The line passes around the mast, returns to the pulley and passes through it, then down to the foot of the mast, around a turning block/pulley and aft to a Spinlock cam cleat within reach of the helm. The sail is usually hoisted with the choker loose and then tightened (‘choker’, yes?) once the yard is at the masthead. When striking down the sail the choker is self-slackening and can be ignored if the weather conditions are good but if it’s gusty the choker line can be drawn in with one hand whilst paying out the halyard with the other.
Lazy-jacks and Running Topping-lift.
These two functions in a single rope are alien to racers but useful for a cruising ESB sailor. The rope end is made fast on the starboard side of the masthead fitting (which has four lugs) and slopes downwards and aft at about 30 degrees to the vertical. It passes under the boom through a D-ring which is about a yard forrard from the aft end of the boom, then rises forwards and upwards to a pulley on the port side of the masthead fitting. It falls alongside the mast to a turning pulley on the foredeck alongside the mast, then leads aft to a Spinlock cam cleat mounted on the centreboard case within reach of the helmsman. The rope is left loose when sailing to minimise distortion of the curve of the sail, but is tightened enough to support the boom horizontal when dropping the sail (to reef, moor to a buoy, anchor, come ashore, pee into the bailer, whatever). The sail falls inside the two 30-degree spans and doesn’t spill out.
The other useful benefit of the running topping-lift (running = adjustable) is that it can be used to support the boom at an angle above the horizontal. When becalmed the drill is:
-
Top up the boom to 45 degrees, secure the tiller in the central position, raise the centreboard
-
You now have headroom to row and sitting room too (no sail in the boat). So row.
-
As soon as a breeze arrives ship the oarblades onto the transom, move from the cross-thwart to a side-bench, grasp tiller and mainsheet, loosen off the topping-lift cam cleat and sail away. Simples.
Kicking strap
I’ve seen many photos of ESBs sailing with their booms elevated to what I consider an alarming angle. When that happens to me I feel very nervous, my gut seems certain that I’m about to lose control of the boat’s stability. Sailing a standing lugsail on or close to a dead run with an elevated boom can be tricky; any but the smallest helm movements require corrective counter-movements and with the sail being almost ‘all on one side’ of the mast that can induce a most unpleasant rolling motion, with the potential to ship water over the ESB’s fairly low freeboard.
My response to this is to ease the downhaul a little (Pilgrim’s downhaul line isn’t cleated off at the foot of the mast, it leads back to the helmsman and ends in another Spinlock cam cleat). As the tension on the downhaul reduces the forrard tip of the boom rises a little (maybe only a few inches) and slides forwards, and this causes the aft end of the boom to dip (maybe as much as a foot or more). Running downwind this moves some (5% ?) of the sail to the ‘other’ side of the mast and the effect is that there is a real 5% reduction in the ‘all on one side’ power of the sail, plus an extra 5% counteracting effort from the luff of the sail being on the other side of the mast and centreline. This redistribution of sail area worked well when running before the wind and it occurred to me that it was a little bit like temporarily changing the rig from standing lug to balanced lug. But before gybing I had to remember to retighten the downhaul first, or duck really low to avoid the swinging boom ………..
I didn’t have kicking straps on my previous boats (a Drascombe Scaffie and an Iain Oughtred Whilly boat) and the 12-foot ESB seemed very cramped between the front of the centreboard box and the foredeck bulkhead so I couldn’t see how I might locate a kicking strap there with an effective pulling angle. The solution adopted on Pilgrim is copied from something I saw online (it might have been connected to the Nigel Irens Romilly/Roxane family of boats). There are two kicking straps, each located just inboard of the gunnels, not on the centreline. The idea is that when the ESB’s boom might go surging skywards it is outboard over the gunnel (either well outboard when running, or some way outboard when reaching), so a simple low-tension downwards pull will be more effective pulling from the gunnel than pulling from the centreline.
Pilgrim’s arrangement is like this: take a longish line, find the midpoint and tie a loop in it. Attach the loop to a fitting underneath the boom about midway from either end of the boom. Each rope goes forward to small block/pulleys screwed into the aft faces of the wooden knees between the foredeck and the gunnels, then aft to Spinlock cam cleats on the thwart in front of the helmsman. Tension is only applied when needed and only on the leeward side. I seldom lock the cleat except on a long tack, I just hold the tail of the rope in the same hand that is holding the mainsheet. A word of warning: if the kicker is locked off at the cleat and forgotten then the boat won’t gybe or tack until you unlock.
There are two minor additional benefits to this double-kicker idea: when becalmed and irritated by the sail slatting to-and-fro from the swell or the wake from passing motorboats, locking both kickers immobilises the boom; and when wishing to sail briefly backwards (picking up the buoy you just missed?) pushing the boom outboard and locking the windward kicker presents the sail back-winded and lets the boat creep backwards (with tiller direction reversed).
Balanced lugsail
Initially I was happy with the standing lugsail, which seems to be used by the majority of ESB sailors. However, once I was given a number of photos of Pilgrim on Ullswater I noticed that the ones I liked ( !) were all taken with a sail full of wind on the ‘good tack’ (rig to leeward) while those with the sail to windward of the mast (on the ‘bad tack’) looked wrong because the mast formed a visible ridge up the sail a little way behind the luff. The area of the sail from the luff to the mast no longer flowed smoothly into the main body of the sail and then onwards to the leech. That small area almost seemed to be back-winded and certainly didn’t appear to generate the power that the ‘good tack’ appeared to deliver. This is all very subjective but conversations with other lugsail sailors revealed that many of them firmly believed their boats performed better on one tack than the other. And sailors with ‘behind the mast’ rigs (gunter, and gaff) said “Don’t know what you mean” . But was that because their masts interfered with the airflow on both tacks ?
Anyway, I re-rigged Pilgrim as a balanced lug and was confident that having the whole of the luff flying in undisturbed air ahead of the mast on the good tack was an improvement (in sail power, in boat speed), even if the ‘bad tack’ still existed. But I became a bit obsessed about ‘Good tack/bad tack’ and wanted to investigate further. I didn’t want to depend on my own subjective feelings about Pilgrim’s set-up and performance, I hoped to learn from other ESB sailors.
Living in Cornwall means there aren’t many ESBs to look at but an excellent resource that is both entertaining and informative is:
https://www.youtube.com/watch?v=A9XShVfqsGs
This is a 12-minute video of the 2015 Old Gaffers Association (OGA) ‘Swallows and Amazons’ race and it provides plenty of opportunity to view ESBs ‘from the outside’. In the first minute it shows that the conditions were gusty, and nobody reefs when they are racing …………….
There are some particularly good bits from the video. About 90 seconds after the beginning watch out for a red sail which experiences a colossal fan-up, apparently twisting the sail twice around the mast, probably caused by hoisting sail without a mast-to-boom square lashing and getting an unlucky gust. There are many examples of ESBs sailing side by side with very elevated booms, and useful comparative views of sailing side by side with standing lug and balanced lugsails. Don’t miss a mother seal shepherding her pups away from the boats at about seven and a half minutes in. A couple of times a helmsman ducks to see under his sail ; Pilgrim has a taller mast than the original, so gives a good view under the sail. There are several times when the ‘bad tack’ is illustrated by the top of the luff not pulling, and at 8 mins 45 seconds the Collie dog seems to think that a yard choker might be a good idea. And finally, looking inside the boats, I don’t think there is a single square lashing to be seen on a boom.
Simplicity versus complexity
We probably all realise that a lugsail rig is perhaps the simplest of all sailing rigs, with just three ropes to handle: halyard, downhaul, and mainsheet. And here I go adding square lashing, choker, lazy-jacks, running topping lift, centre mainsheet instead of the traditional turn-aft-towards-the-rope-horse arrangement. There is a school of thought which says "When everything superfluous has been removed from a machine then it has reached perfection". All I can say in my defence is that those extra controls do serve a purpose and that although an ESB can be sailed with just three control ropes the extra ones do something useful at some time (often, many times). And that during my ownership of Pilgrim the sailing has been safe and the experimentation has been interesting because I have tried to make my little boat sail to the best of her ability.
Motivation
"The best of her ability" obviously means being weatherly and as speedy as the breeze will permit (nobody I know wants to be the tail-end Charlie when sailing in company). Some years ago now we had a little group of elderly local matelots from around about the Carrick Roads in Cornwall, sailing together and calling ourselves the Last of the Summer Wine Sailors. Advancing years have reduced the group to only two dedicated regulars, myself and Mr. K. S. (sometimes known as Mr. Manacles, from one sudden whim to sail from the sheltered Carrick waters to those deadly rocks, alone). K. is a very experienced singlehanded sailor of dinghies, a man who constantly tests to see if he can luff up a bit and who is maddeningly good at detecting beneficial windshifts. In order to spend more time sailing alongside him and not just staring at his distant transom, I had to make sure that Pilgrim did a (Cornish) "proper job".
Pilgrim's Self-gybing Centreboard
When delivered Pilgrim was fitted with a flat galvanized steel centreplate hanging in a narrow centreplate box. This was my choice, erroneously based on a belief that a heavy plate would keep the boat more upright during my singlehanded sailing. But my progress to windward seemed disappointing with significant leeway. The boat seemed to be unwilling to achieve better than about 60 degrees to the wind and consequently I was often steering a pinching course very unsuitable for the free-sailing lug rig. I soon realized that the boat would perform better with a foil-shaped centerboard as used in modern class-racing dinghies.
Then I remembered that I had read about Victorian leisure-sailors who sometimes fitted centreplates that could be ‘gybed’ to point a little upwind of the boat’s centreline, generating some lifting force to windward rather than simply using the centreplate to reduce leeway. (I guess that these were flat centreplates because only at the very end of the Victorian era were canvas-and-wood gliders beginning to be equipped with foil-shaped wings, and I imagine the science of aerodynamics was a little ahead of hydrodynamics).
The annual Thames barge sailing matches began in 1863 but I’ve heard it said that by the mid 20th century the more competitive barges had leeboards with an asymmetrical half-foil shape on the outer faces of the leeboards in order to generate some lift to windward, and in some cases these leeboards were made to act at an angle to the barges’ centreline to increase this beneficial effect.
Researching gybing centerboards I found a reference in a 1967 book called Expert Dinghy and Keelboat Racing by Paul Elvstrom, (Olympic gold medalist in 1948, ’52, ’56, ’60 and eleven times world champion in various classes). He shows a diagrammatic plan view of a foil-shaped centerboard with small hemispherical ‘knobs’ attached two-thirds back from the leading edge. These knobs filled the internal space in the centreboard box when in the lowered position while the leading edge was free to slide to port or starboard on the pivot-bolt. The text suggests two or three degrees of centreboard gybing can be achieved within the standard (scrutineered) centreboard box, and that this is automatic when changing tack, without involvement from the helmsman.
Another reference to gybing centreboards is found in The Techniques of Small Boat Racing (Hodder & Stoughton, 1960, edited by Stuart Walker). Although this book is now more than 60 years old it was very interesting. The writer recommends a foil such as the NACA (the US National Advisory Committee for Aeronautics) 0006, a foil which is 6% as thick as it is wide (about three-quarters of an inch thick for a foil to replace my 12-inch wide centerplate). Anything approaching a one-inch thickness would entail complete replacement of my existing centreplate box, and a quick sketch of the cross-section of an inch-wide NACA 0010 foil showed me that a new centerboard box would have to be wider at the aft end than forrard, to achieve an optimum nine degrees angle of attack (as recommended by NACA).
Google provided access to the digital profile for a NACA 0010 foil at
http://airfoiltools.com/airfoil/details?airfoil=naca0010-il
And Google provides a formula for Lift at
http://www.grc.nasa.gov/WWW/k-12/WindTunnel/Activities/lift_formula.html
Lift = ( ½) d v2 s CL
Where d = fluid density (air for aircraft, water for boats)
v2 = velocity (squared)
s = size (the active area of an aircraft wing or boat’s centerboard)
CL = coefficient of lift (the characteristics of foil thickness, shape, and angle of attack).
I’m no mathematician but I felt that in a practical application such as a centreboard the Lift formula above
(Lift = ½ d v2 s CL) could be simplified because although the fluid density is very relevant if you are doing accurate theoretical calculations such as comparing the lift generated by an aircraft’s wings at the Equator and at the North Pole (the fluid density of hot and cold air being significantly different), it is irrelevant to sailors because we are always sailing in “today’s weather and water”. So ‘d’ was irrelevant to me.
Similarly, the area ‘s’ and the characteristics which make up the Coefficient of Lift will be fixed once you design and construct a gybing centerboard (ie the foil thickness and shape, and an angle of attack restricted to less than ten degrees). Once you have settled on the centerboard size ‘s’ and the foil characteristics then ‘CL’ ceases to be a variable.
So, Lift equals ½ d v2 s CL becomes Lift is proportional to ½ v2 (the '2' here means squared)
Conclusion: a foil-shaped centreboard at a small angle to the centreline produces lift that follows a law not of diminishing returns, but of increasing returns proportional to half of the square of the boat’s speed through the water.
Thus:
Speed m.p.h. Lift = 1/2 v2
2 4/2 = 2
3 9/2 = 4.5
4 16/2 = 8
5 25/2 = 12.5
6 36/2 = 18
7 49/2 = 24.5
Etc
Admittedly I don’t know what units this lift is measured in, but I don’t care because I’m not a boffin, I just want the practical benefit of getting an element of lift to windward instead of only making leeway.
There seem to be four key points:
-
as well as the centerboard having to be foil-shaped, the pivot hole has to be made oval so that in the fully lowered position the board can wiggle 8 or 9 degrees to port or starboard of the centreline
-
the internal dimension of the centerboard box has to be wide enough so that the trailing edge of the board has room to swing to leeward and the leading rounded edge to windward, jointly achieving 8 or 9 degrees of ‘attack’ (but not more) when in the fully lowered position
-
the thin slot in the top of the centerboard box will need modification so that the up/down operating arm doesn’t restrict the deflection of the fully-lowered centreboard down in the enlarged box
-
the slot in the keel will need to be enlarged to allow the foil-shaped centerboard to gybe left and right. (Inevitably the larger slot and the water-filled box will generate turbulence and cause additional drag. I applied an excellent product, Hawk Slot Gasket Strip).
Briefly, these points were dealt with as follows:
The prototype centerboard was made from a sheet of 2mm stainless steel sandwiched between two half-foil-shaped sections which were built up to an over-size profile using car-body repair paste, then power-sanded to the chosen NACA profile. Achieving the correct profile involved printing off the foil shape from
http://airfoiltools.com/airfoil/details?airfoil=naca0010-il
and then scaling up to a 12” length to match the width of my old flat centreplate, and cutting out a negative half-shape of that profile from thin plywood to use as a guide during power-sanding.
The pivot hole was drilled out and then made oval with a rotary file.The short flat ‘neck’ of the centreplate operating arm was supplemented by welding on a 10mm diameter stainless steel rod which would protrude through the slot in the top of a new, wider centerboard box.The size of the new box was estimated by drawing a full cross-section of the foil (from the half-foil shape described above) with a centreline marked on it, then taking a photocopy, cutting out the foil shape and superimposing it on a plan-view drawing of an enlarged (wider) centreboard box with the foil canted at 9 degrees from fore-and-aft.
The original centreplate box was removed and an MDF mould made for the replacement box.The mould was then used to make a glassfibre box which was epoxied into position. The boat was turned over and the slot in the keel widened to accommodate the required movement of the new centerboard, and to limit it to ten degrees each side of the centreline. These jobs were done by a professional boatyard.
The slot in the wooden top of the box was also widened to accept the new 10mm operating arm and at the aft end of the upper slot a ‘T’-shaped slot was cut across the box top so that the arm could move left or right only when the centerboard is fully lowered. (This ‘T’ shape was later enlarged into a thin forward-pointing arrow-head ‘V’, in order to make it easier to haul up the centreboard swiftly when required, and autonomously in the event of grounding in shallow water).
I then sailed Pilgrim in this configuration for a season, subsequently replacing the car-paste half-foils with a new version with wooden cheeks and with a 4mm stainless steel ‘inner’ to the sandwich construction, because the early thinner prototype version got bent. Both these foil centreboards gybed successfully (ie automatically) from tack to tack and it appeared that slippage to leeward has been reduced, or even perhaps eliminated.
But then having gone to all that trouble I would think that, wouldn’t I ………… it's called confirmation bias.
Recently I have resolved to try to check this. I have a simple black-and-white Garmin 158 GPS which displays speed and bearing of travel. I also have a TillerClutch (a brand name for a bit of rope which passes through a lock/unlock device beneath the tiller arm). A test procedure which I think might work is to make a small wooden wedge which would fit across the interior of the aft end of the centreboard case, with a central groove which would accommodate the 10mm operating arm which would be vertical when the board was in the fully lowered position. This grooved wedge would therefore stop the automatic gybing operation of the centreboard, holding the trailing edge of the board in the straight-ahead position. A thin cord would allow the wedge to be withdrawn without the helmsman approaching the centreboard box.
The procedure would be as follows:
-
Insert the wedge. In good conditions (steady wind, little sea-state), adopt an up-wind course, not pinching or too much close-hauled, and allow speed to build up and level off
-
Tie off the mainsheet, lock the tiller, sit still and establish an equilibrium of speed and bearing (and start a video recording of the locked controls and the GPS screen)
-
Pull out the grooved wedge
-
Video the centreboard’s leading edge swivel from straight ahead to 9 degrees to windward (indicated by the trailing edge operating arm moving to the leeward side of the centreboard box top)
-
Observe and record speed and bearing changes, if any. Resulting video to be published here if conclusive.
The “Good Tack, Bad Tack” discussion: making Pilgrim’s lugsail dip.
An informative little book is the late Phil Bolger’s ‘Straight Talk: 103 Sailing Rigs’ (well, 103 variations on the half a dozen rigs we all know). It’s a nice little A5-format book containing sketches of boats with different rigs, plus a page or more of knowledgeable comment on each one. The late Mr Bolger says “The Dipping Lug was the most powerful sail possible with primitive technology” (he means before wire rope and Dacron). Victorian fishing boats’ crews wanted that driving power from dipping their lugsails over to the leeward side in order to be the first boat home and so get the highest prices for their catch.
But on the subject of the standing lugsail (which is the way I first rigged Pilgrim) the most complimentary things Mr Bolger could muster are the simplicity of the rig and that the mast and spars can fit conveniently inside the boat. To me that’s not a ringing endorsement when my boat spends the whole sailing season with its mast raised and the whole winter with it removed. He also says “Sometimes when the crew of a dipping lug grew aged and decrepit they would re-rig the boat as a standing lug. Because that sail stands closer to the mast, which spoils the air flow, especially when the sail is on the weather side of the mast, it doesn’t develop the driving power of the dipping lug”.
Despite Bolger’s comment about the standing lugsail’s attractions for “aged and decrepit” sailors (I am now aged 78 years), I began to muse on the topic of Pilgrim’s standing lugsail getting interference from the mast. I then remembered that a few years before I had come across a video by the late Gary Hoyt (well-known developer of the Freedom wishbone rig) showing the prototype of his ‘offset rig’ which used various high-tech systems to keep a square-headed fore-and-aft sail away from the broken airflow around the mast on both port and starboard tacks: http://www.garryhoyt.com/id32.html
(There used to be a video at this web address but now it’s only a photo gallery and a data sheet).
This offset rig is a pretty radical idea and we sailors are mostly a conservative lot so Mr. Hoyt couldn’t get any boatbuilder to put this patented idea into production, but he remained a strong believer in presenting a clean luff to the wind and he used to insist “the sail doesn’t know about the centreline”.
Then I found a YouTube video about 12 minutes long that shows Essex Smack’s boats at the 2015 East Coast Old Gaffers Association Swallows and Amazons race:
https://www.youtube.com/watch?v=A9XShVfqsGs
Living and sailing in Cornwall it was a new experience watching East Coast ESB’s ‘from the outside’. I was struck by how the throat part of the standing-lug sails were back-winded when sailing on their ‘bad tack’ (the tack where the sail, yard and boom are pressed onto the windward side of the mast), and how that effect is made worse by the helmsman ‘pinching’ rather than freeing-off. (I find that racing, official or spontaneous, often makes helmsmen pinch).
Another instructive YouTube video is ‘Lug Sail Good Tack vs Bad Tack’ by The Boat Rambler:
https://www.youtube.com/watch?v=i7Frmj6Hsnk
This shows two identical lightweight balanced lugsail craft (Goat Island Skiffs, with booms), each with the sail rigged on opposite sides of the mast, and whichever boat is on the ‘good tack’ consistently points higher and sails faster. The video ends with a useful still shot of the significant luff area of sail ahead of the mast, which is providing strong drive on the ‘good tack’ but is actively back-winded on the ‘bad tack’. The video-maker concludes that before setting off on a journey the sailor should consider which parts of the route will benefit most from the ‘good tack’ effect (sailing faster, pointing higher) and hoist his lugsail on the appropriate side of the mast according to the direction of the wind.
Back in Victorian times (1837 to 1901) the traditional dipping luggers, mostly 30 or 40-foot fishing boats, had the advantage of a large crew for hauling-in heavy fishing nets. To tack they would lower the loose-footed sail to the deck, pick up the yard-and-sail bundle, manhandle it around to the other side of the mast and re-hoist it to leeward. In 'Working boats of Britain' Eric McKee says "The dipping lug ....... drew well and worked well to windward, but required a strong and skillful crew when changing tacks".
Fast-forward to today and that would seem completely irrelevant to a singlehanded leisure sailor in a 12-foot ESB dinghy. A dipping lugsail may be very powerful but I wouldn’t dream of removing Pilgrim’s boom, it’s far too useful downwind. Once again Phil Bolger’s little book got me thinking. I began wondering if I could adopt a technique used by the Mediterranean sailors of boats with the settee rig (a lateen rig has a huge triangular sail, a settee rig has a boomless quadrilateral sail with a very short luff). Settees are tacked (says Mr. Bolger) without lowering the sail by having a ‘dipping line’ which is used to pull the front tip of the yard, and the sail’s throat, downwards and aft until it is vertical and can be swung forward on the other side of the mast. Being soft, the rest of a loose-footed settee sail follows the yard across to the other side of the mast. But a sail with a boom would have to be man-handled behind the mast and across to the new leeward side.
The final thing that I learned while investigating goodtack/badtack was from Wikipedia, about the International 12 dinghy. Designed in 1912 by George Cockshott and adopted as the Olympic 12-foot dinghy in 1920 and 1928, (in 1924 the French hosts selected their own 12-foot-ish dinghy), this standing-lug rig had a boom and a dipping-line that allowed the crew to shift the yard and sail to leeward on both port and starboard tacks. See the rig diagram in the side-panel on the Wikipedia site: https://en.wikipedia.org/wiki/12_foot_dinghy
But to me this only seems to be feasible in the cut-and-thrust of racing because very little of this Olympic dinghy's sail’s luff lies ahead of the mast, the boom is controlled by gaff-jaws, and the helmsman has the option of a crew member to handle the dipping-line during tacking.
So, could ‘dipping’ be advantageous for an Essex Smacks Boat?
Advantages: A cleaner luff to the sail, ahead of the mast and a little outboard of the centreline, free of disturbed airflow on both tacks. That suggests less drag and more drive, and possibly a few degrees more weatherly when beating?
Drawbacks: 1. Tacking without dropping the sail would mean having to dip the tip of the yard to bring the throat of the sail and then the tips of both the yard and the boom far enough aft of the mast to get the sail over to the other side of the mast. Hopefully the sail would want to blow over after the boat’s head passes through the eye of the wind. But dip-tacking would be much slower, and probably difficult or dangerous in bad weather.
2. A sail that can stand on alternate sides of the mast suggests the need for two tack pendants (downhauls) somewhat ahead of the mast, the leeward one being used on alternate tacks. While the leeward one is tight and ‘active’ the other ‘passive’ one has its ropework draped loosely around behind (aft of) the mast. They mustn’t get tangled up (with each other, or the other fittings on the fore-deck).
Evaluation: There are definite disadvantages and only possible advantages. Because I’m not a racer improved performance when beating and reaching is worth much more than quick tacking. Beating and reaching is probably 80% or more of small-boat sailing, and running downwind makes up the remaining 20% or so. If a tack normally takes 30 seconds, what does it matter if it takes a minute? (Except in an emergency or a ‘tight spot’).
So I would certainly adopt the idea of considering the wind direction and then choosing which side of the mast to hang the boom and the yard before departing from the slipway. And in good conditions of breeze and sea-state I would consider changing the rig from one side to the other on the open water if the sea state and the duration of the next board seemed to make the effort justified. But if this ‘dipping-with-a-boom’ approach could be made to work reasonably well it doesn’t necessarily have to be used for every tack. On short tacks in confined waters I would leave the sail on the ‘bad’ windward side and accept the interrupted airflow on alternate tacks.
So, on Pilgrim I rigged two cheek-blocks fixed port and starboard to the front tip of the boom. I removed the old standing-lug 4-part tack pendant (downhaul) from the foot of the mast and fitted two new 2-part downhauls to the gunnels a little way ahead of the mast. I added two quarter-circle wooden pieces one inch thick into the right-angled spaces between the centre thwart and the sides of the centreboard case; this gives me a place in front of my knees for mounting two friction clutches for controlling the two new downhauls (which are now easily adjustable for tension from the helming position). There are also friction clutches for all the other up-the-mast lines (running topping lift, halyard, choker), plus the twin kicking straps and the centreboard uphaul. (This extensive group of cam-cleats is affectionately known as the Spinlock Farm).
I also rigged dipping lines like those on the 1920 International 12 dinghy mentioned above, each side of the sail from the forrard tip of the yard down to a fitting under the midpoint of the boom.
And this is how it worked (forrard mainsheet, so helmsman facing forwards during tacks) for a starboard tack, for example:
- on starboard tack the port downhaul is held down tight by its clutch, and the starboard downhaul is slack, draped from the starboard gunnel around the aft of the mast and passing through the starboard pulley at the front tip of the boom and back around the mast to its block on the starboard gunnel.
- before tacking, tighten up the topping lift to support the aft end of the boom, and loosen the ‘choker’ (the loop of rope that encircles the mast and holds the yard tight against the mast)
- tiller gently over to leeward then held in place with my knee, or the self-steering cord-thingy
- unlatch the clutch for the port downhaul, the boom slides forward a little which loosens the downhaul as the bow comes into the eye of the wind
- half-rise from the starboard side-bench, support the middle of the boom in my left hand, (palm up and bent elbow down), and catch the dipping line in my right hand, and then simultaneously pull aft and down on the dipping line and pull aft on the boom
- ideally the wind helps the sail to move over (to starboard of the mast in this example) and when that has happened I release the dipping line and let go of the boom (which swings forward alongside the mast under its own weight)
- move under the boom to the new windward side, grabbing the slack end of the starboard downhaul rope and hauling it tight in the clutch as I sit down on the port bench
- centre the tiller, tighten the choker, loosen the topping lift to open out the leech
- bear away to pick up speed, then harden up on the new tack.
Not surprisingly I found that this complex sequence of actions was both tiring and unpredictable and would only work in ideal conditions, not too windy and without too much of a sea running. I think here is the place where I really should confess that I have a strong tendency to over-think issues and over-complicate my potential solutions/improvements. I see this as being tenacious but others claim it is stubbornness, even a certain pig-headedness .
But having 'fessed-up to that I do feel that good conditions (light breezes) are just when the extra power from an undisturbed luff would be most beneficial. In bad weather or short-tacking situations I would not bother at all with dip-tacking.
However, most of my sailing is out-and-back trips and because I do believe in the 'good tack, bad tack' hypothesis I have found that it is worth changing the rig from one side of the mast to the other (on the slipway) before setting off on a trip which is likely to involve sailing on one tack or the other for the majority of the time. And likewise to shift the rig to the other side of the mast (on the beach) before starting the return leg of the journey.
Lastly, I have now removed the over-complex twin-downhauls arrangement and rigged a single four-part downhaul (a strong pull to get a taut luff) which is secured on a 12-inch wide metal 'traveller' on the foredeck a few inches behind the mast. With a slack-ish square lashing at the mast/boom junction this allows the boom to 'float' a few inches downwind of the mast on the good tack, resulting in an ideally shaped sail full of wind. While testing this arrangement with the luff ahead of the mast and 'flying' to port of the centreline I was so impressed with the good tack that I rigged a temporary line (the black line in the photo some way below here) to keep the downhaul secured to leeward, even though the force of the wind kept it there anyway. To my surprise on the bad tack (with the downhaul position unchanged off-center on the metal traveller) the sail achieves a slight top-to-bottom outwards slope from being close to the mast at the level of the yard, to a few inches away from the mast at the level of the boom, and this is sufficient to stop the sail being folded against the mast on the bad tack. So on the bad tack the sail is not ideally shaped (that is, shaped with the amount of draft achieved on the good tack), but it is not actually compromised by the mast intruding into the curve of the sail.
This arrangement seems to me (confirmation bias?) to produce very effective forward progress when sailing upwind, but I must flag a warning. Michael Storer knows a great deal about lug sails and on his website
he says that mast and boom should always be kept in contact otherwise the tip of the boom oscillates in gusts. I can't say I've seen this happen, and my 4-part downhaul keeps the front of the boom well cranked down, but I'm still hesitant about differing from Mr. Storer even in minor things .......


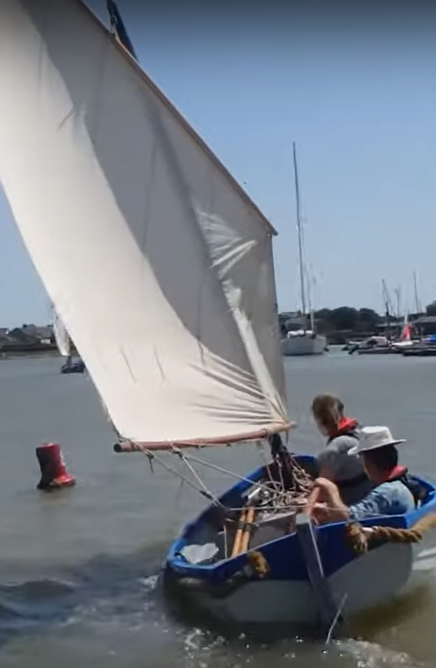
Here is an early photo of Pilgrim at Ullswater, sailing on the 'Good Tack' with the standing lugsail to leeward of the (old, short) mast.
And below a view of another ESB with the sail to windward of the mast

In this photo the red line is the 'choker', the clean blue-flecked rope is the halyard, the grubby blue-flecked rope is the combined lazy-jacks and running topping lift. The centreplate uphaul is on the left, the red-flecked rope is the 4-part tack pendant (downhaul), the loose pink-flecked line is the port kicking strap, and the black line is an experimental option to hold the traveller's downhaul up to windward on the 'bad tack' (portside only in this photo).
Latest Thoughts, 4Q2024
Gybing Centreboard
My idea was to try to prove the effectiveness of the gybing centreboard with a video showing a wedge to centralise the centreboard, then its removal and hopefully an improved course to windward after the board gybed. That doesn't work, because the wedge only centres the trailing edge but the leading edge can still slide a little to windward. That invalidates the test and currently I can't imagine a practical device that would centralise the entire centreboard yet be easy to remove on the water whilst videoing.
However, my confidence in the practical effect of the gybing centreboard is undiminished because after tacking and bearing away a little to gain speed Pilgrim continues to edge up to windward (as shown on the GPS), even though the bow remains pointed at some distant landmark. The whole boat seems to be edging to windward (not just pointing further to windward). But somehow I've got to prove it on video .......... otherwise it's confirmation bias.
Good Tack, Bad Tack
Currently I feel that by positioning the downhaul on the traveller's leeward end about six inches outboard of the centreline I am getting a well-shaped sail with the luff away from the mast in undisturbed air on the good tack, and on the bad tack the sail is no longer distorted by the mast because of the 'slope' caused by the downhaul being away from the centreline. This is a good-enough benefit to cancel out all my past experiments with dipping the balanced-lug sail in order to maximise time spent sailing on the 'Good Tack'. I shall be keeping the sail rigged to port of the mast.
The square lashing is omitted in this photo. I sail with it slack.
I think my experimental metal 'traveller' for the downhaul is therefore redundant and could just as well be replaced by a simple D-ring bolted through the foredeck. Other ESB sailors who might want to try this arrangement and assess results could do so by adding a caribiner between the lower pulley block of their downhaul and the existing anchor point, and then easily shift between the existing near-the-mast downhaul anchor and a new off-centre anchor-point. Try it?
Update, 2Q2025
When preparing Pilgrim for the 2025 season I took the photo below which shows the sail hoisted to port on the 'bad tack' but viewed from starboard. The sail is filled with a pleasant breeze and no sign of a crease because the downhaul is tightened and anchored on the 'traveller' several inches away from the centreline. There is enough separation between the mast and the boom to accomodate the 'draft' in the sail without any crease.
Dump the Choker
If I'm no longer going to dip the sail then I will probably remove the mast-to-yard Choker that I've been keen on for many years and instead adopt the halyard arrangement recommended by Michael Storer, see
https://www.storerboatplans.com/category/tuning/lug-rig-setup/
.......... and then search for Controlling Sail Twist.
Mr. Storer acknowledges that the origin of this control line is to be found in the Dixon Kemp Manual of Yacht and Boat Sailing, published in 1878. This arrangement takes the halyard over a masthead pulley, down to a pulley at the hoist-point on the yard and then 'outside' the mast (on the opposite side to the yard) to be secured to the front tip of the yard. The advantage of this system over the Choker is that the weight of the yard and sail automatically retains the yard close to the mast while raising or lowering sail, but has sufficient mobility to allow the helmsman to guide the yard forrard or aft as it comes down.
(There, by removing a control line I've actually simplified the Spinlock Farm, a little).

